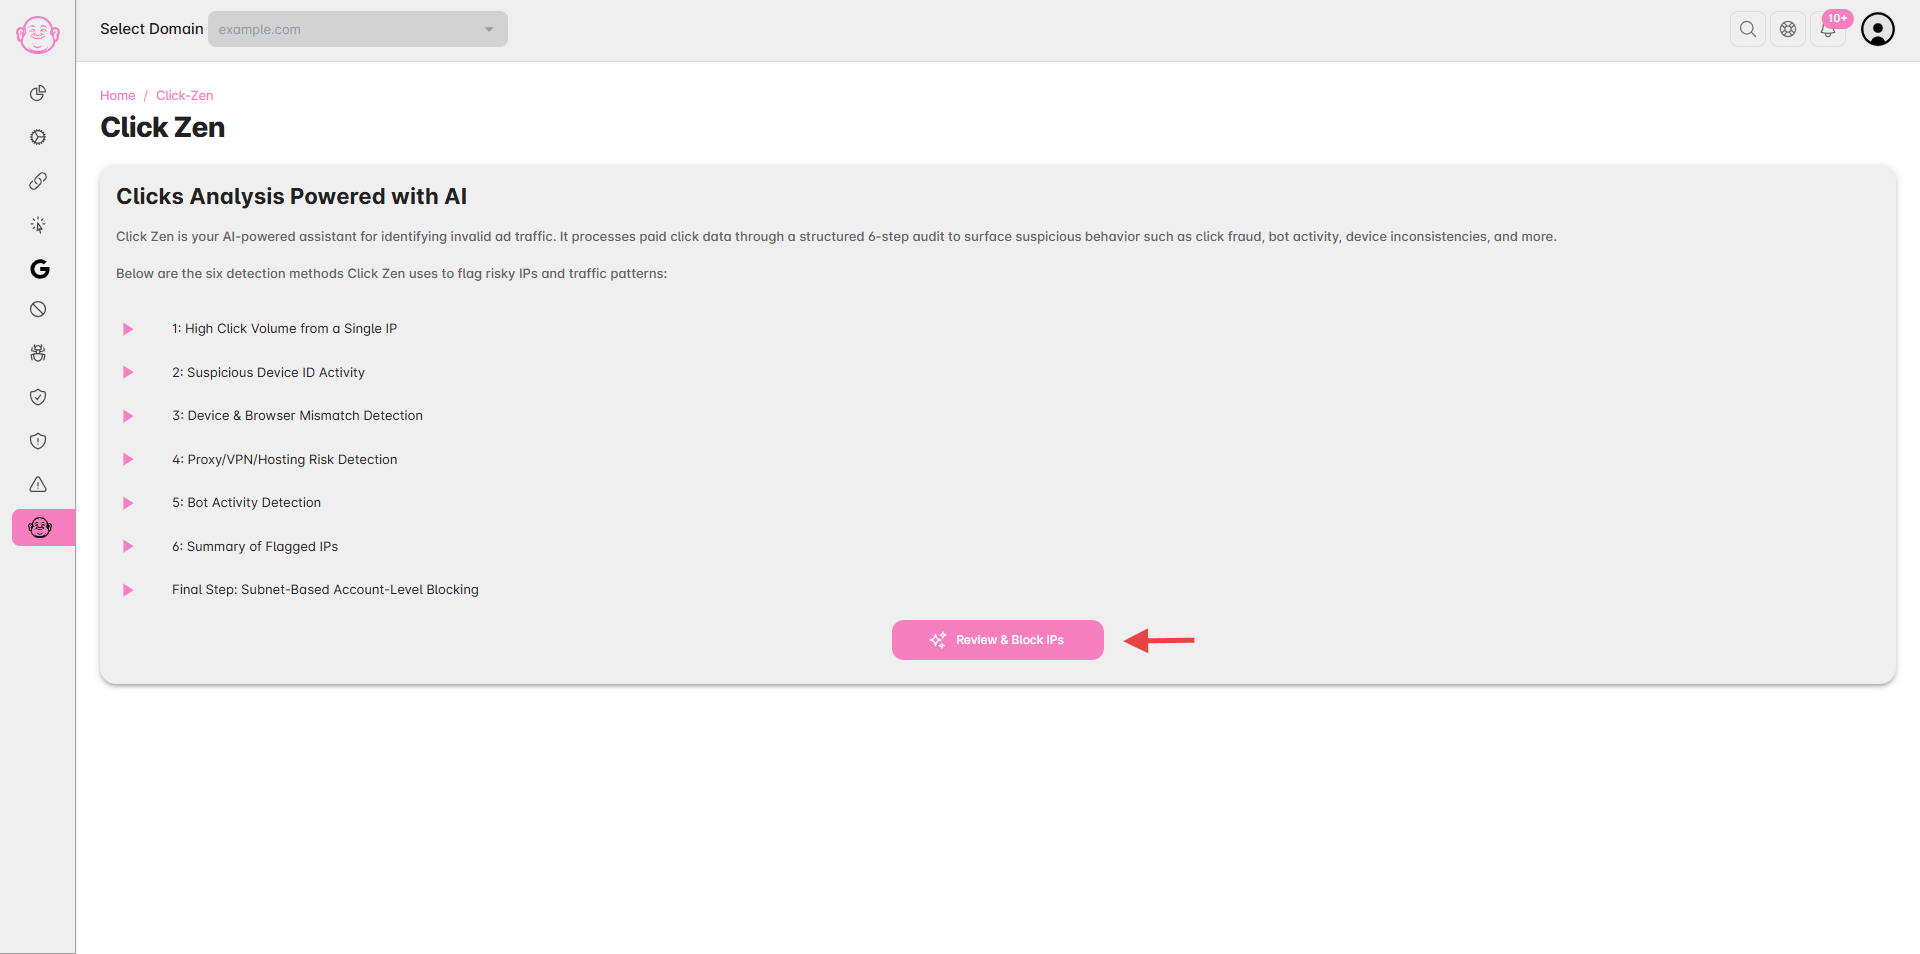
Click Zen provides AI-driven recommendations to help you identify and block invalid, fraudulent, or suspicious IPs before they harm your campaigns. Once the analysis completes, you can easily review and take action on these IPs.
Step 1: Log in to Click Buddha
Login into your account and Open your Click Buddha Dashboard.
Step 2: Go to Click Zen
From the sidebar, click on Click Zen (marked with theme color) to open the analysis section


Step 3: Review and Block IPs
Once the analysis is complete, you’ll receive a notification to Review & Block IPs.
Open the Click Zen report to see AI recommendations for risky IPs, traffic patterns, and sources

Step 4: Review AI Analysis Results
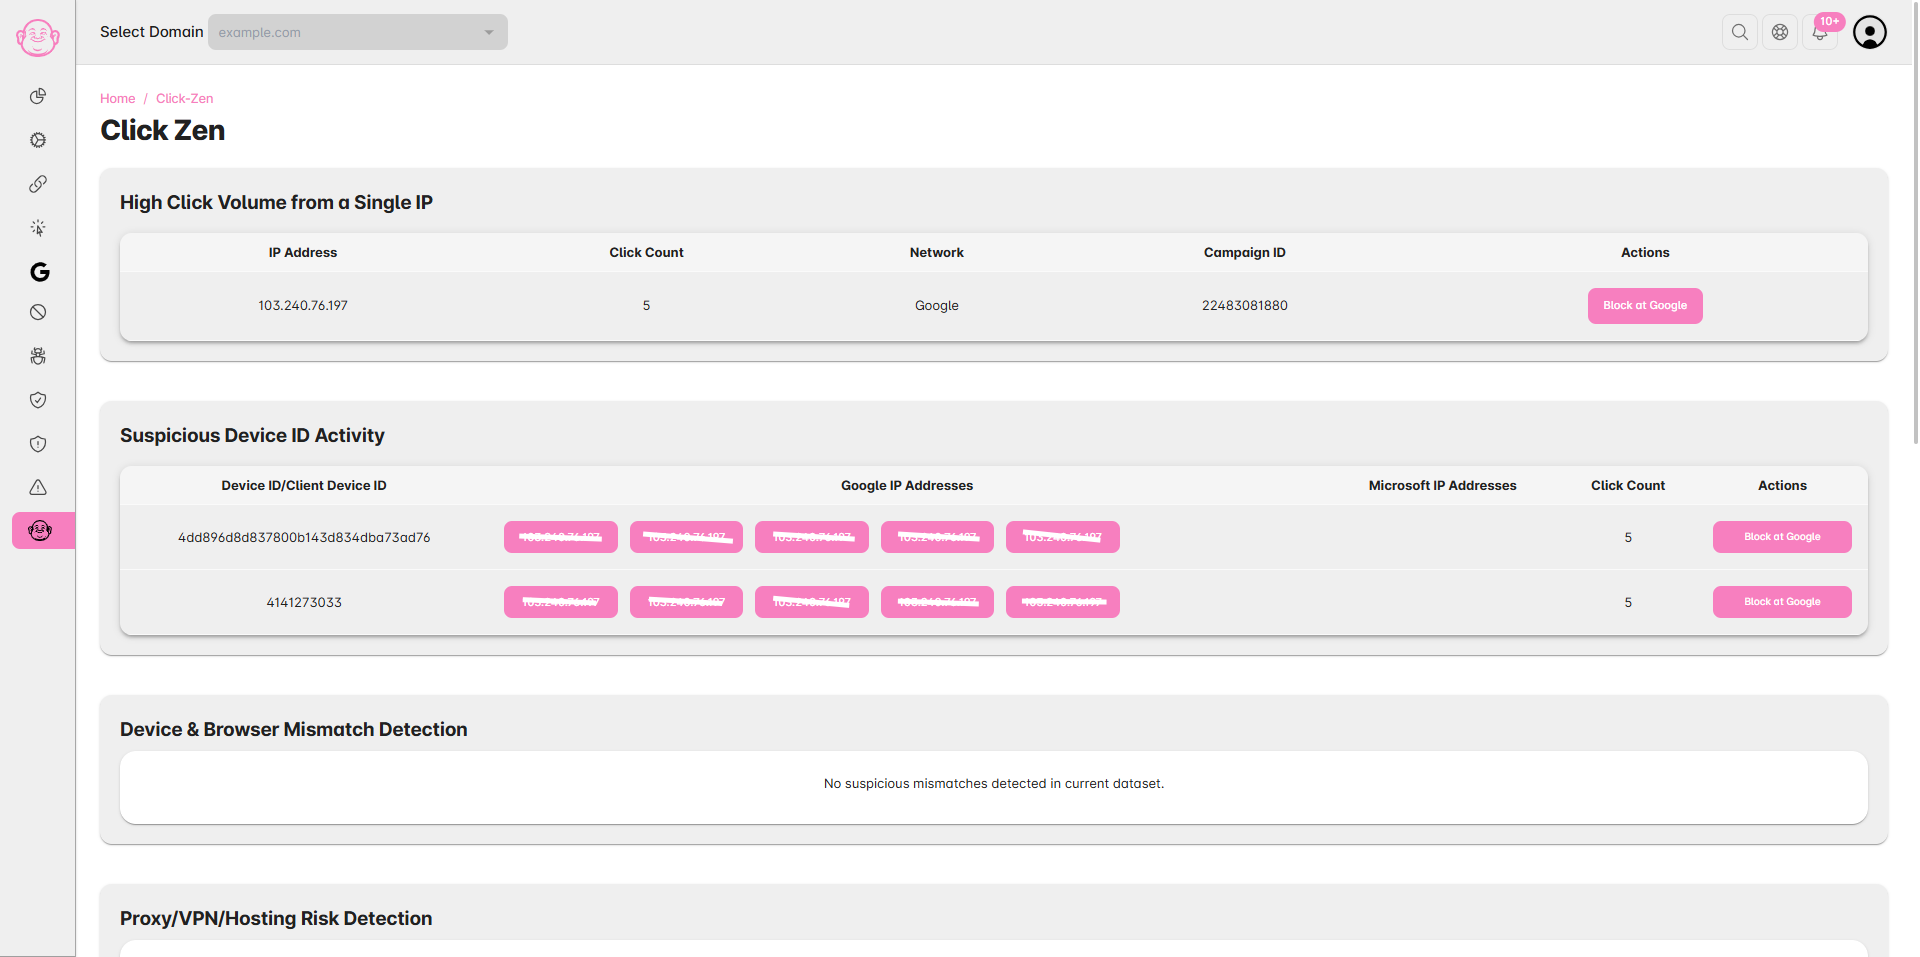
After running or completing an analysis, you’ll see a list of Flagged IPs along with their detection categories — such as:
High Click Volume
Suspicious Device ID
VPN/Proxy Activity
Bot Detection
Browser or Device Mismatch
Each entry includes the reason for flagging, traffic source, and timestamp.

Step 5: Block or Whitelist IPs
To block an IP:
Select one or more flagged IPs.
Click “Block at Google” to instantly add them to your blocked IP list at Google.
Click “Block at Microsoft” to instantly add them to your blocked IP list then copy the List of IPs and paste to the Exclusion list of Microsoft.
If an IP looks safe or wrongly flagged, leave it to exclude it from blocking.


Step 6: Confirm and Sync with Google Ads
Once confirmed, blocked IPs are automatically synced with your Google Ads for the domain.
✅ Tip: Regularly review Click Zen recommendations to maintain clean traffic and reduce wasted ad spend. The AI model continuously learns from your decisions to improve detection accuracy.