Click Buddha allows you to view all blocked IPs on your website, helping you monitor protection, identify potential threats, and ensure legitimate users are not mistakenly blocked.
Step 1: Log in to Click Buddha
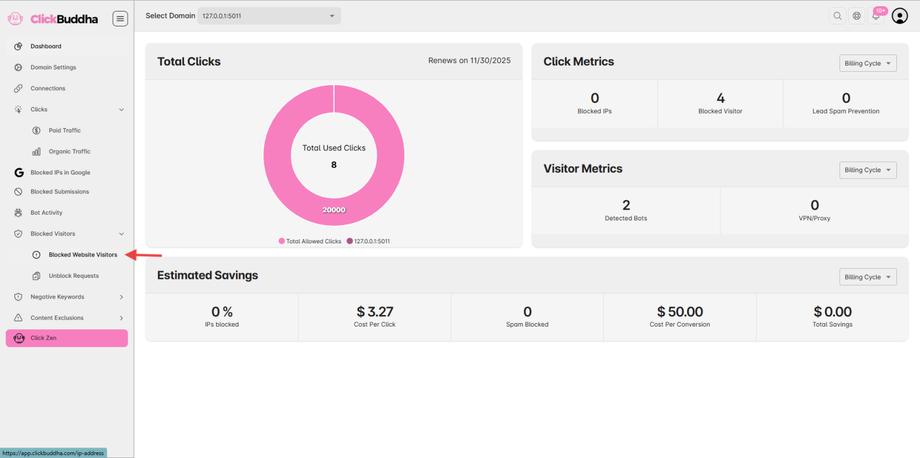
Login into your account and Open your Click Buddha Dashboard.
Step 2: Go to Blocked Visitors
From the sidebar, Go to Blocked Visitors -> Blocked Website Visitors.
This section lists all IPs currently blocked at Click Buddha.

Step 3: View Blocked IPs
In the Logs page, view the list of IPs marked with Icon (🚫) is detected/blocked by VPN/Proxies.
This will display all traffic identified or blocked as VPN, Proxy, or Data Center IPs.

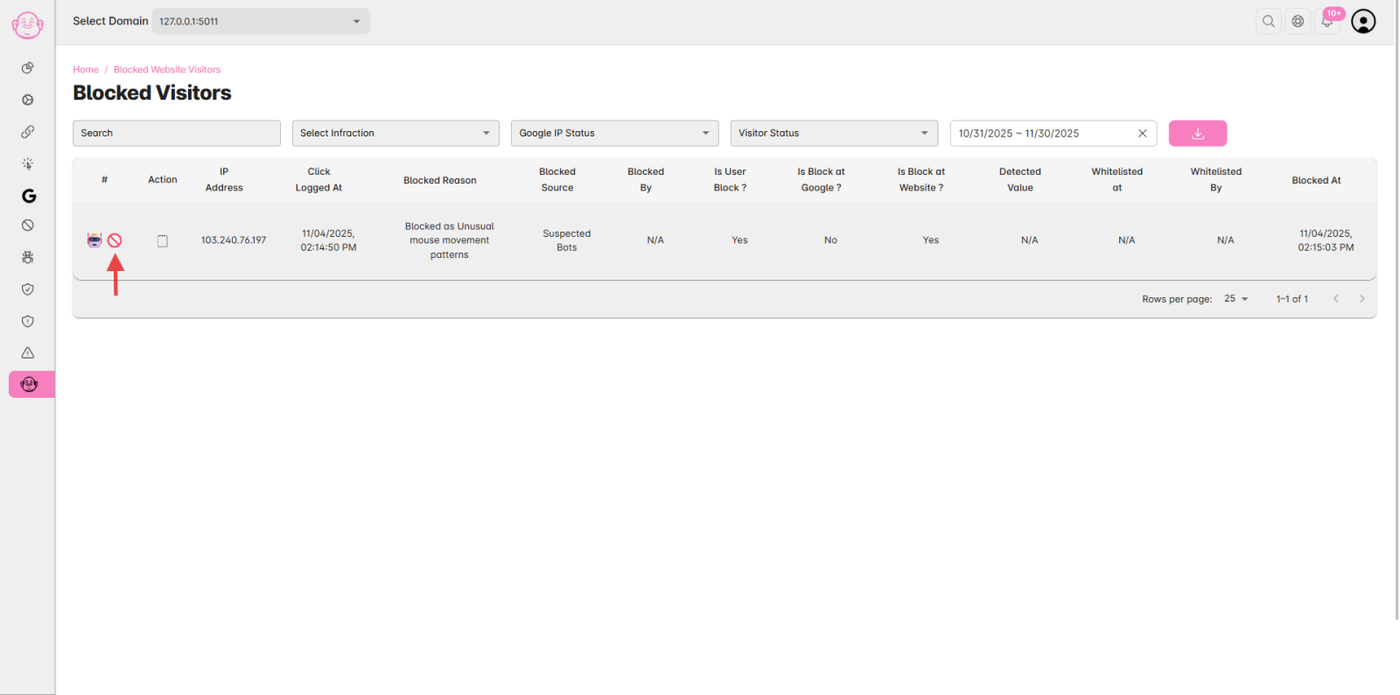
Step 4: View IP Details
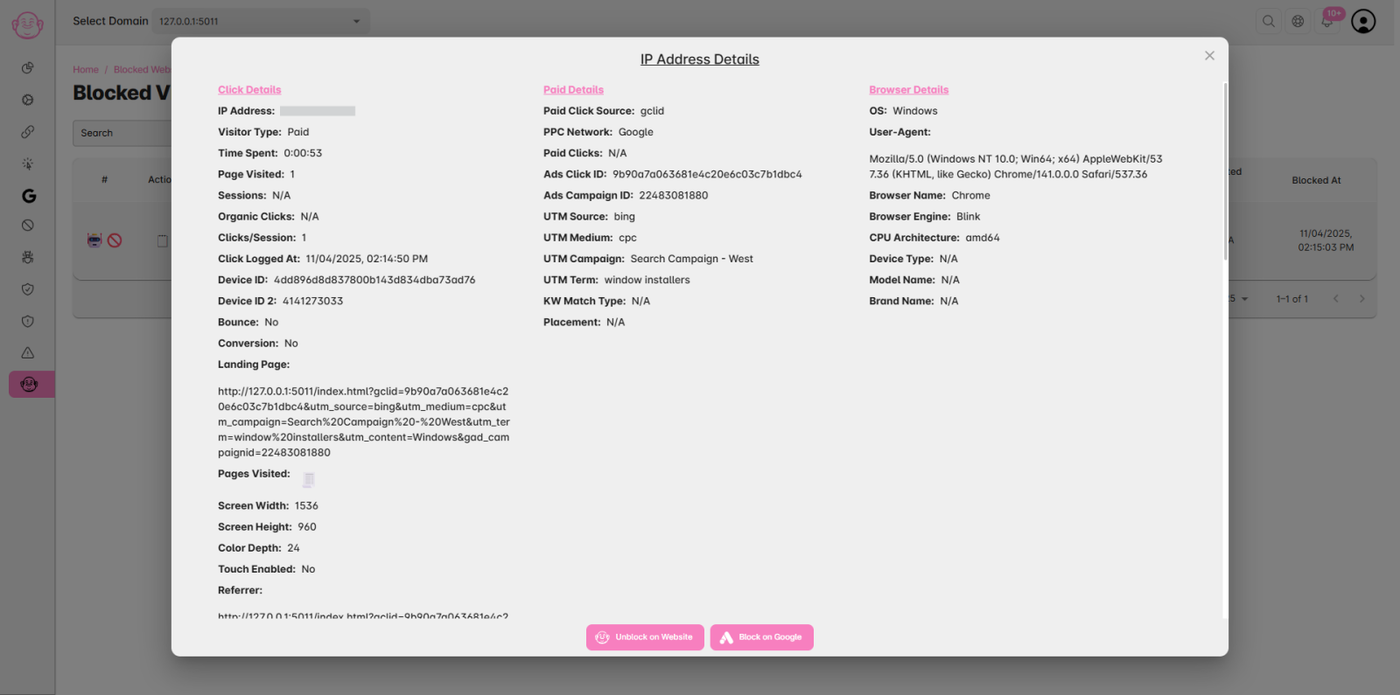
In the clicks table, look for the 🗒️ (Details) icon in the Action column.
Click this icon for any row to open the detailed click view.
Each blocked IP entry includes:
IP Address
Blocked Source (Google Ads / Website / Form / Bot Detection)
Action Taken (Blocked / Warned)
Date & Time of Block
✅ Tip: Regularly review blocked IPs to avoid impacting legitimate visitors and ensure your ad protection is functioning correctly.