When a visitor is blocked by Click Buddha’s website protection system, they can send an unblock request through the on-screen popup. You can review and decide whether to whitelist (approve) or reject their request directly from your dashboard.
Step 1: Log in to Click Buddha
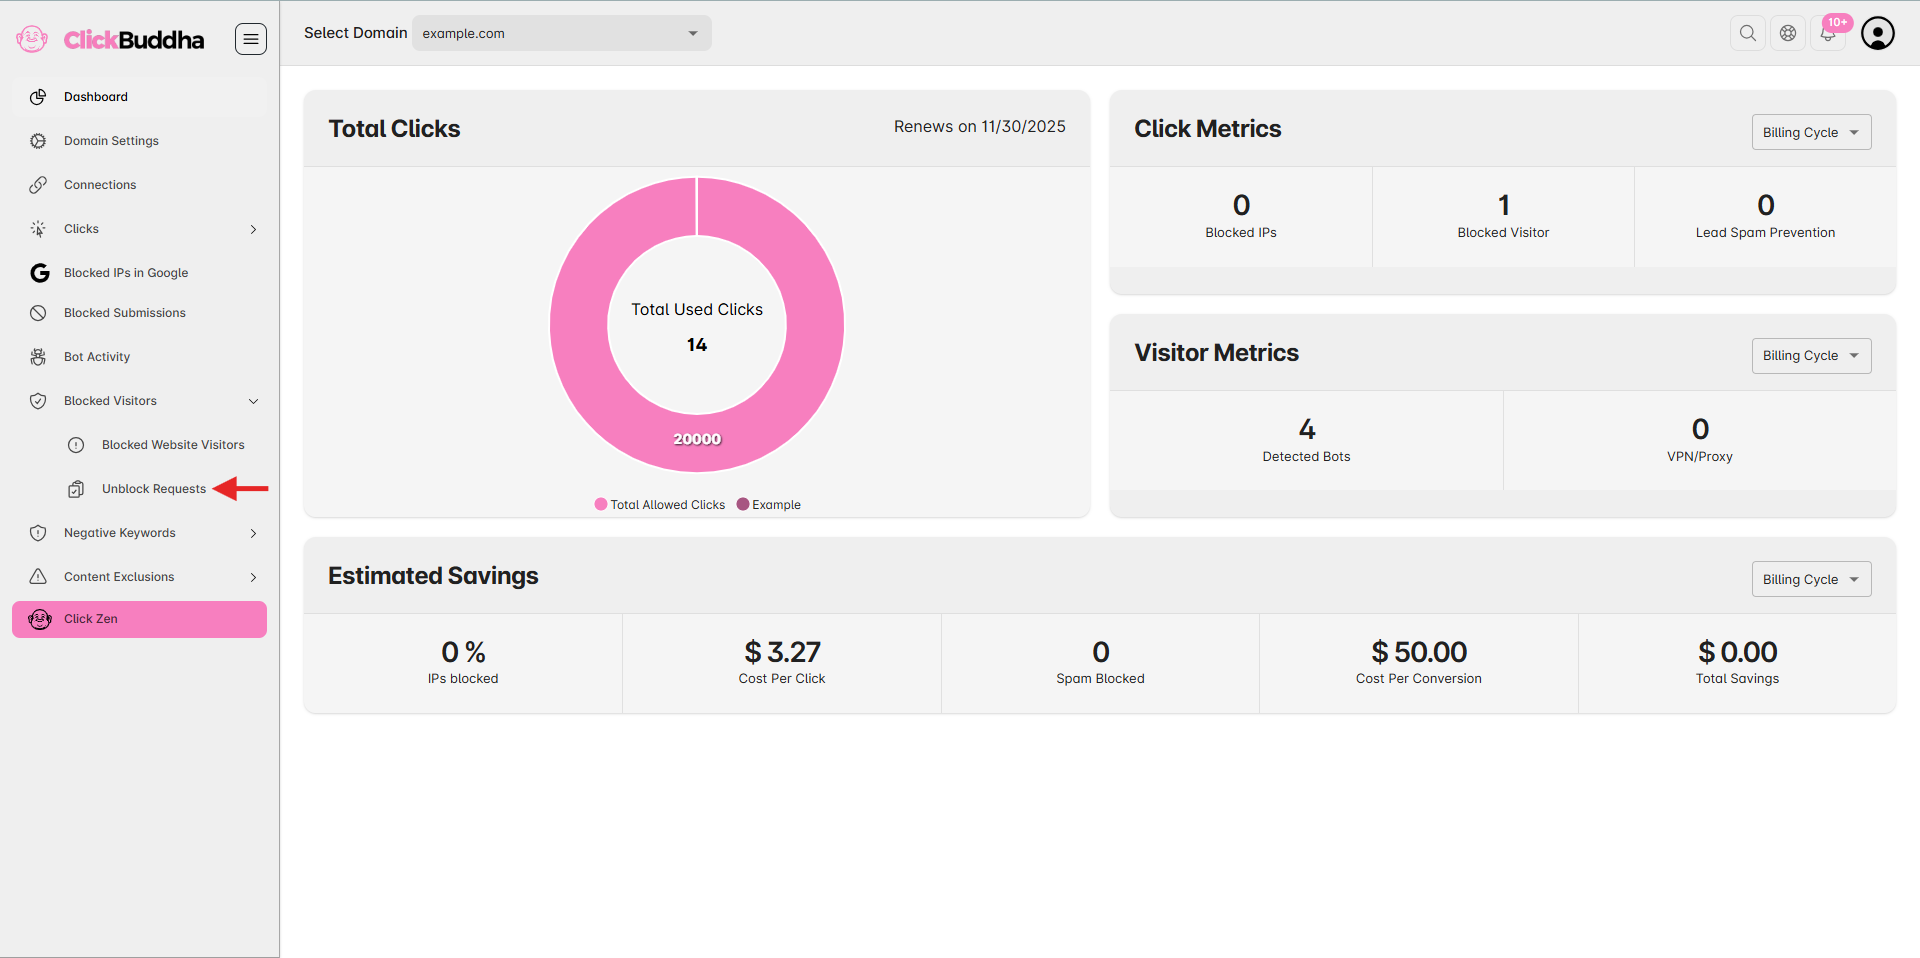
Sign in to your account and Open your Click Buddha Dashboard.
Step 2: Go to Blocked Visitors
From the sidebar, click on Blocked Visitors → Unblock Requests to view all recent visitor requests.
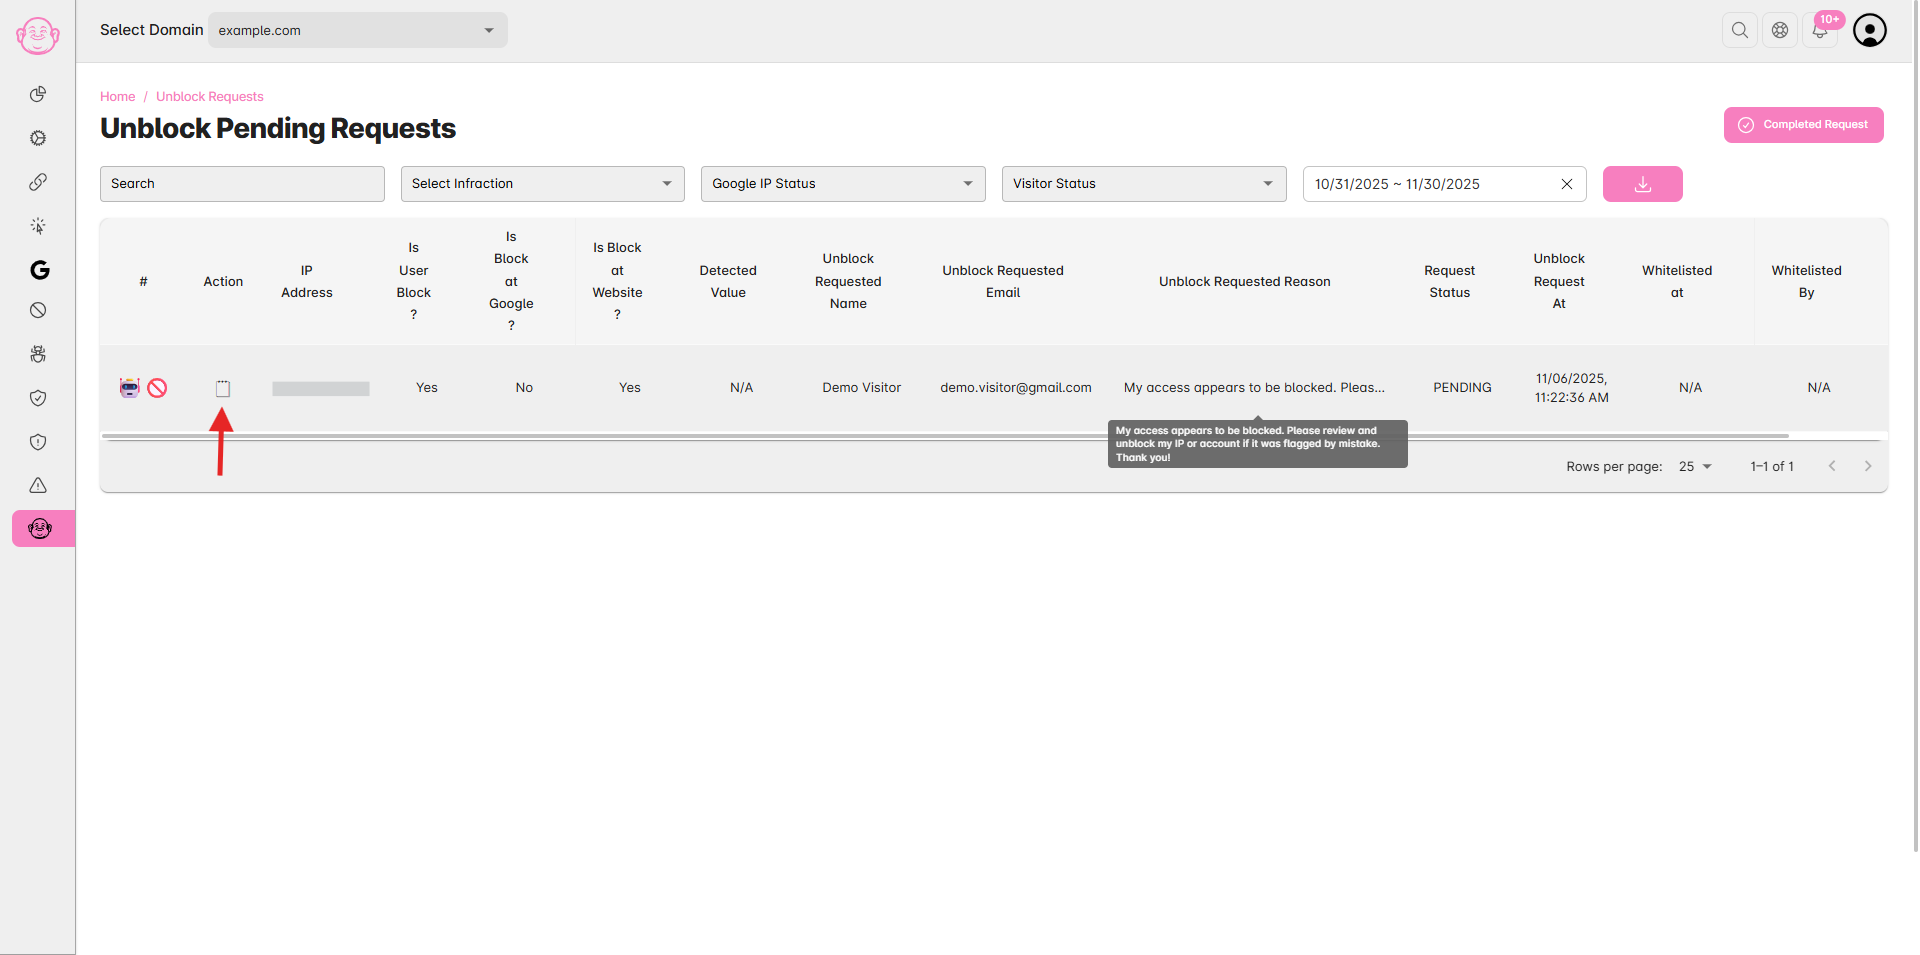
Each request includes the visitor’s IP address, domain, visitor name, visitor email, reason for request, and timestamp.

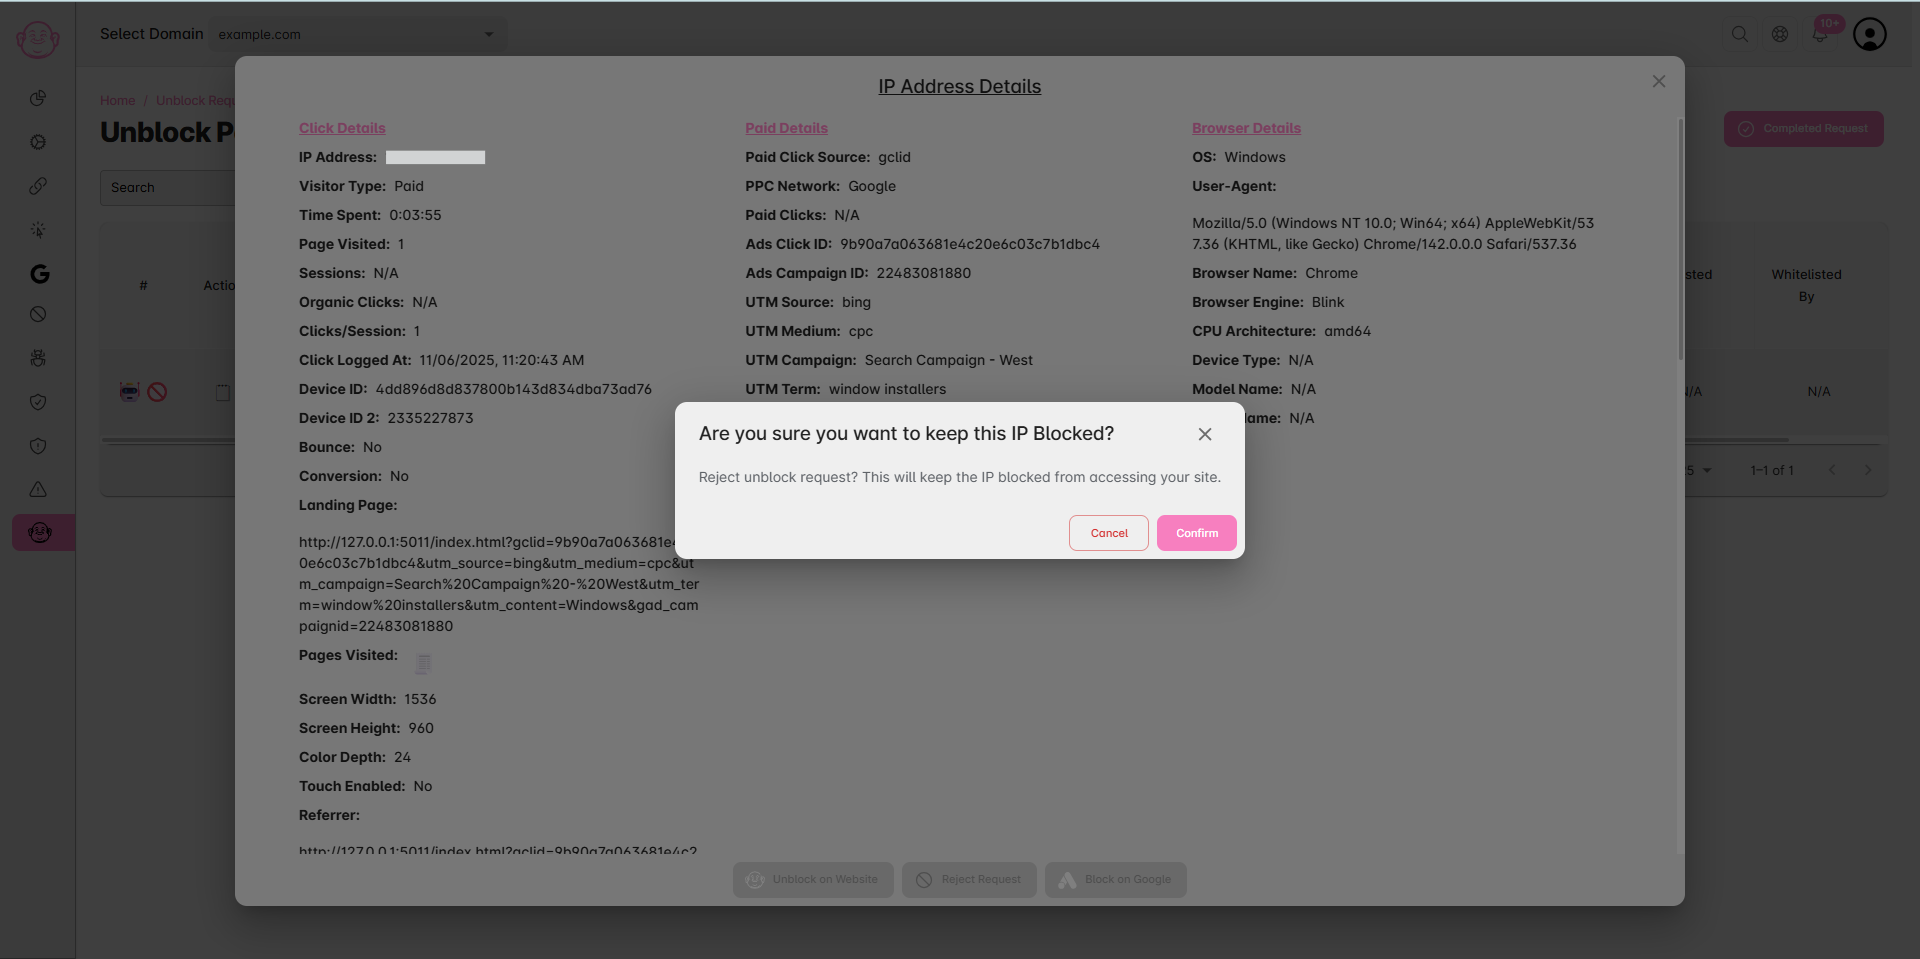
Step 3: Review Visitor Details
Click the 🗒 View Details icon next to a request to review
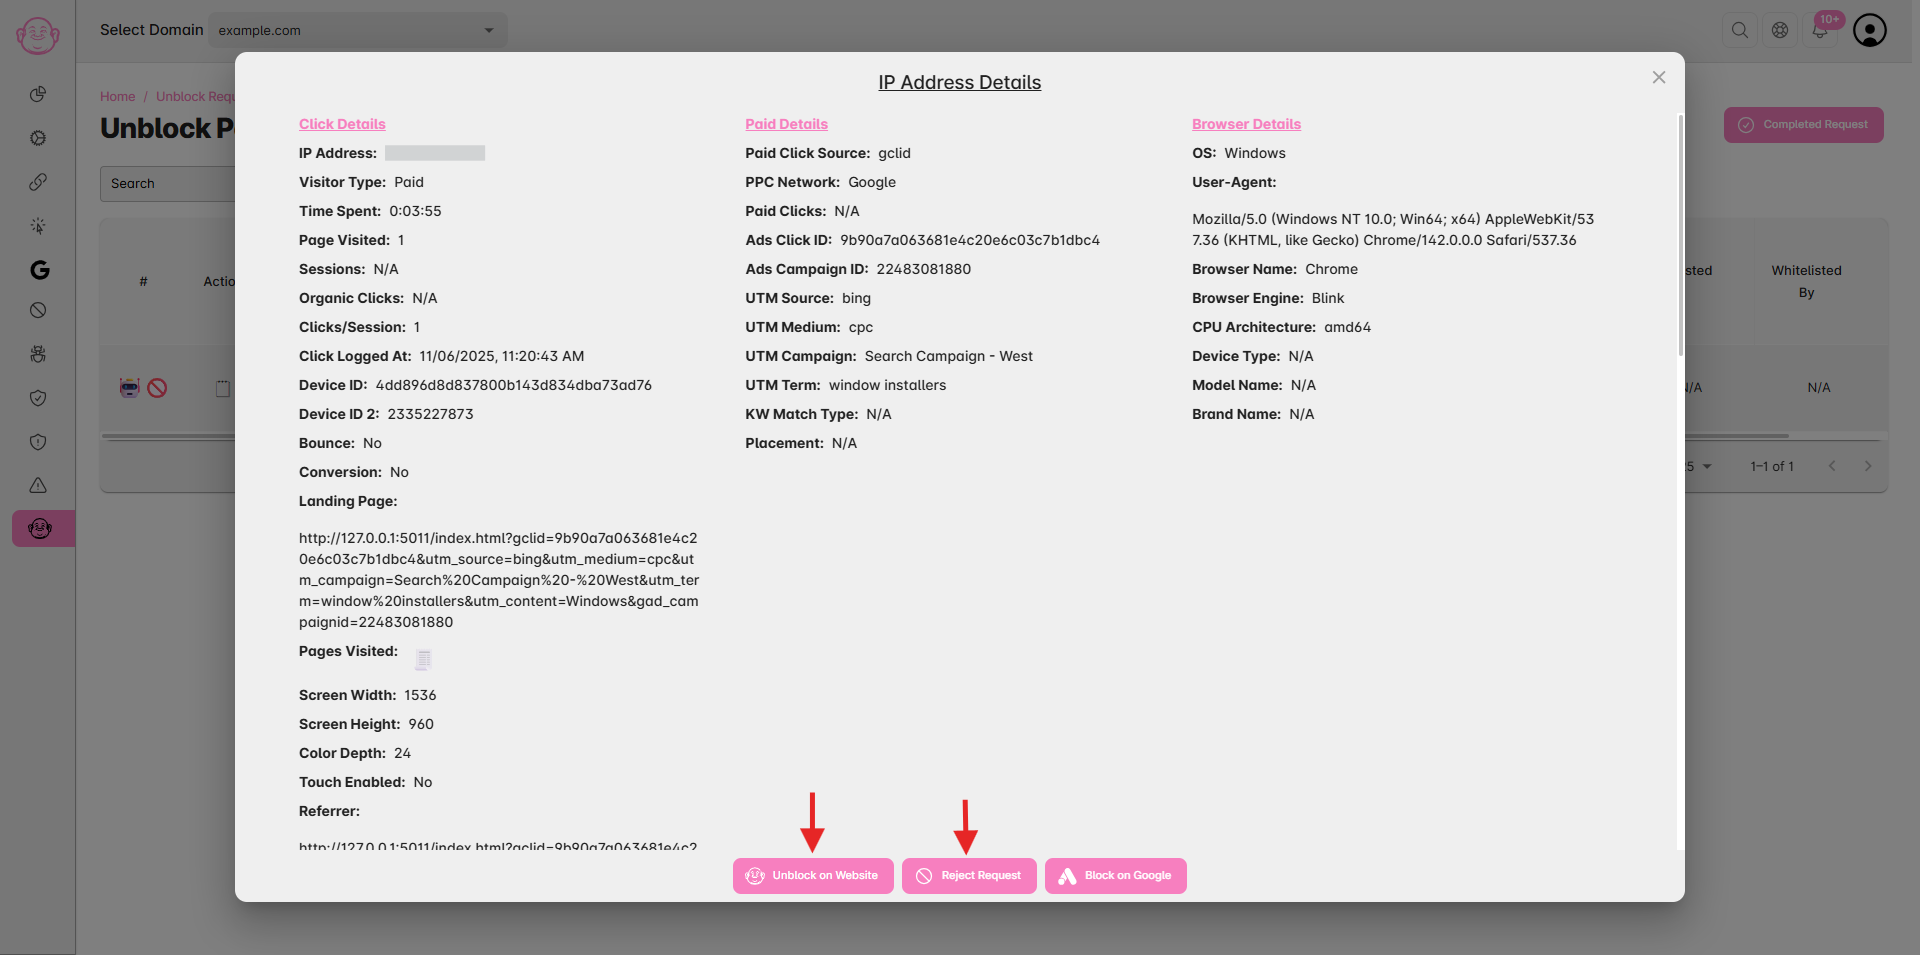
The reason the IP was blocked (e.g., VPN, bot, form spam, etc.)
The visitor’s previous activity logs
Any additional data like device info or location
Use this information to decide if the request is legitimate.

Step 4: Whitelist or Reject Request
To Whitelist (Approve) → Click the Unblock at Website button.
The visitor’s IP will be added to your Whitelisted IPs list, restoring their access.To Reject (Decline) → Click the Reject Request button.
The visitor will remain blocked and receive a message or an email like:“Your unblock request has been declined. Please contact the site administrator for further assistance.”
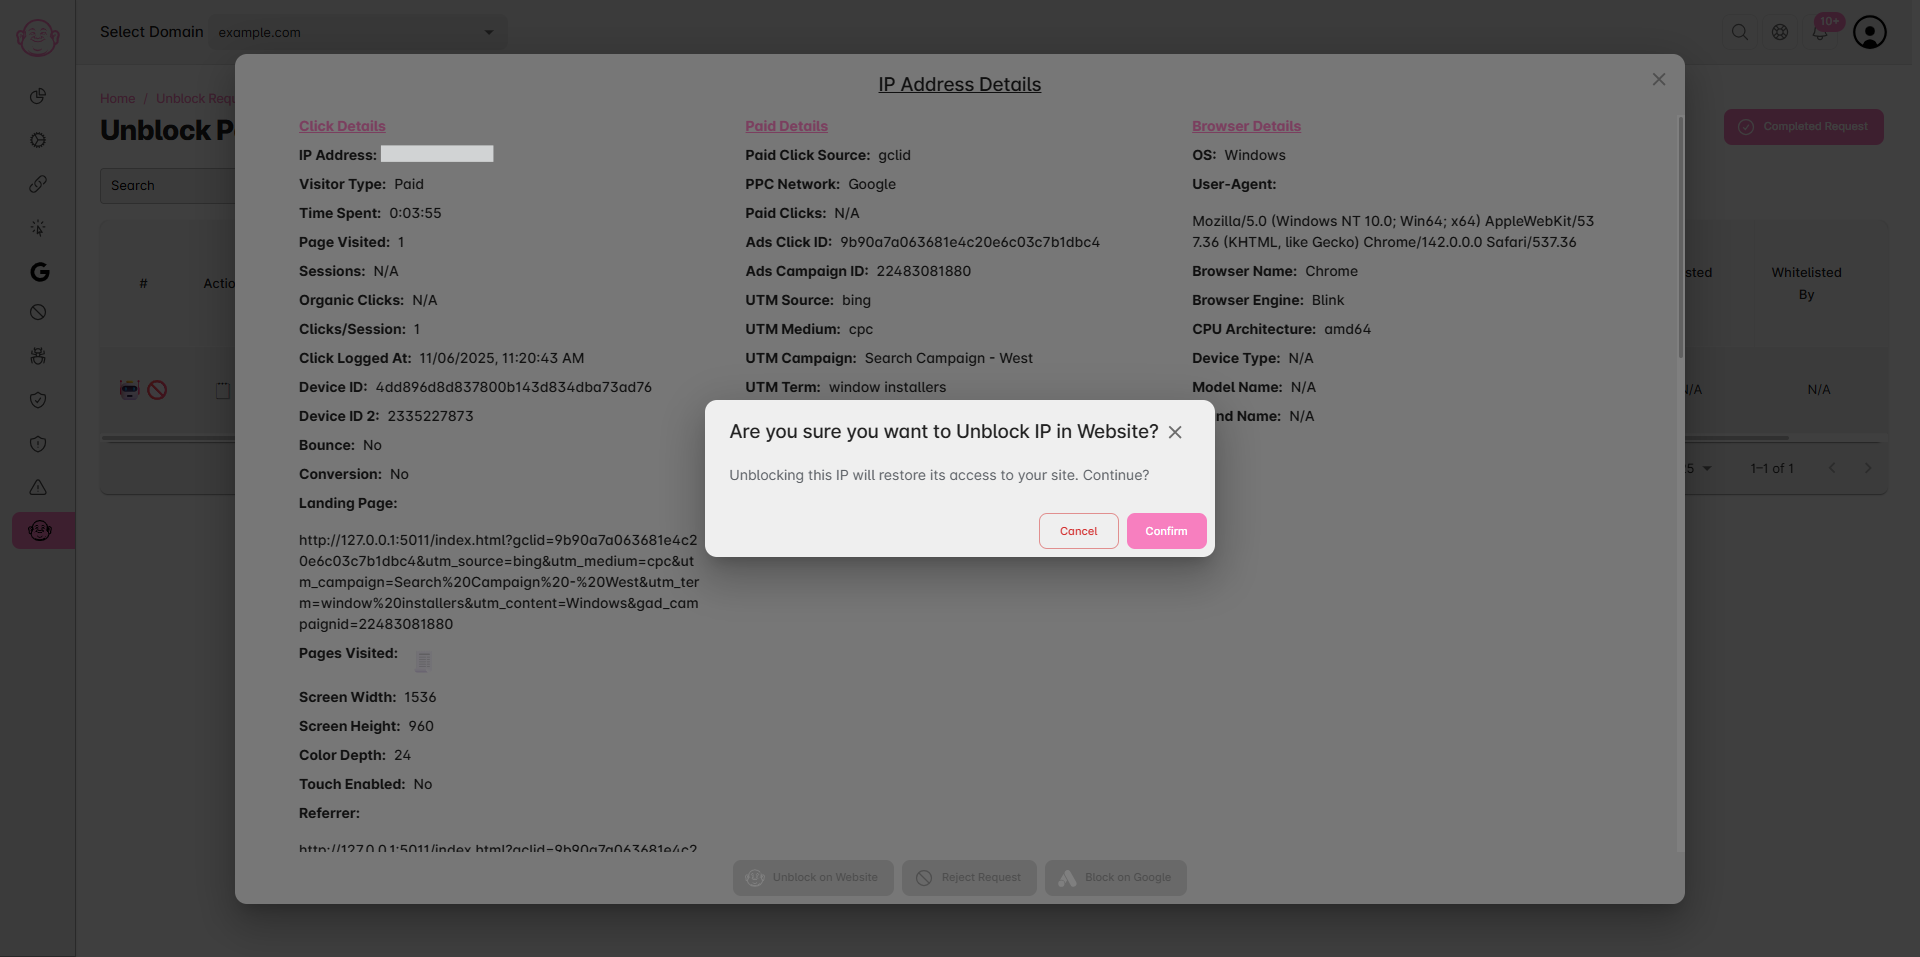
Step 5: Confirm Action
A confirmation popup will appear — review the details and confirm your choice.
Your action will be recorded in the Activity Logs for transparency.


✅ Tip: Regularly review unblock requests to ensure legitimate users are not mistakenly blocked. If a specific IP keeps requesting access frequently, it may indicate automated bot activity, and rejecting such requests is recommended.